In some cases, the Recovery Partition in Windows, which contains the Windows Recovery environment, can be absent. This can lead to various issues, such as troubleshooting the computer when it stops working or resetting. Using the Windows Recovery environment is explained here. This article will guide you through adding a recovery partition in Windows 10 or Windows 11.
Add a Windows Recovery environment Partition in Windows
The following steps will guide you through adding a 1 GB Recovery partition from the C drive and then setting it as a Recovery partition. Before proceeding, please verify whether your disk uses an MBR partition scheme or GPT. The commands for both are different. Remember, if you have Windows 11, it will always have a GPT partition scheme. Windows 11 does not support MBR.
- Open the Disk Management by pressing the Win+X keys and selecting Disk Management.
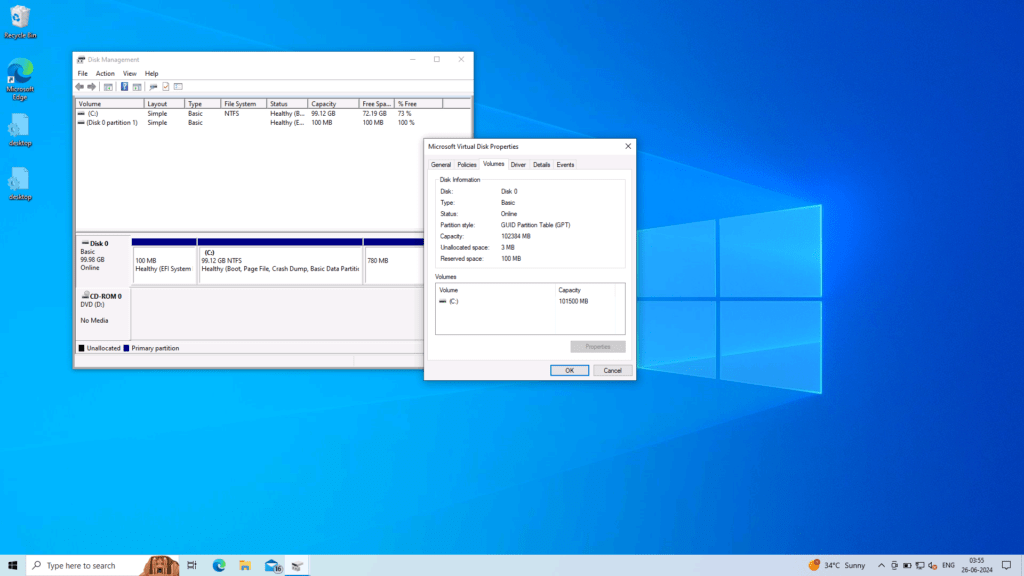
- Right-click Disk 0 in the bottom half, or Disk 1, where the C drive resides, and choose Properties.
- In the example below, open the Volume tab and note the Partition Style Information – MBR OR GPT. In this case, you need to use the set ID command given later in the article as instructed.
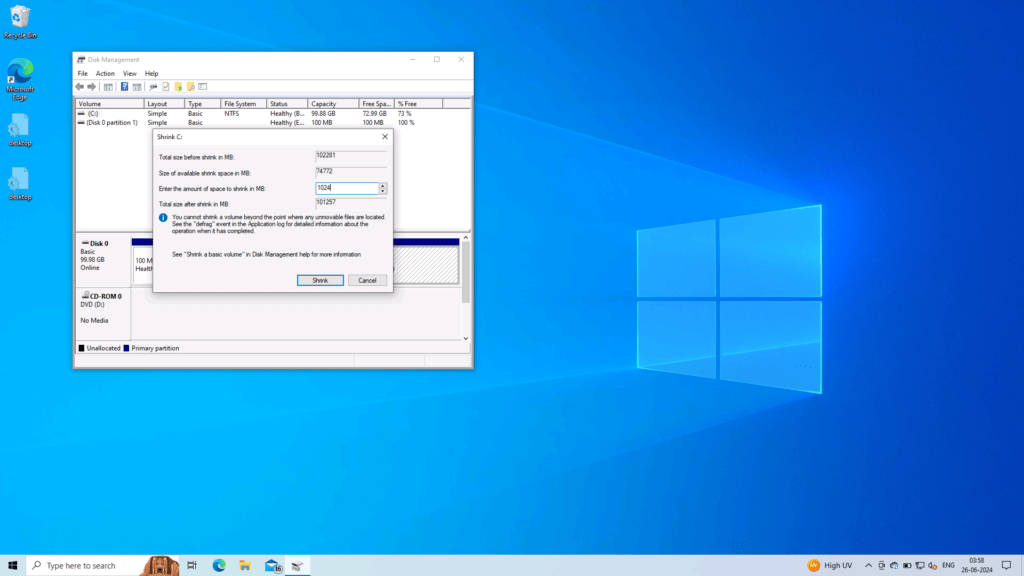
Right-click Drive C in the same Disk Management Window and choose the Shrink Partition option. Please enter the value 1024 in the size to be shrunk, as it is 1GB.
The space will now be unallocated. Right-click the Unallocated Space and choose New Simple volume.
Afterwards, name the volume WinRE. Do not add a drive letter; instead, choose to Format the drive.
Check if Files are present.
Next step is to check if the Image file for the recovery partition is present. If we want to add a Recovery partition, the Image must be present. It is stored in the C:\Windows\System32\Recovery\ folder. As it is a hidden file, do the steps below as a first course to show the hidden OS files.
- Open File Explorer.
- Click the “View” tab. • Click on “Options” or “Change folder and search options” (depending on your Windows version).
- In the “Folder Options” window, click on the “View” tab.
- Under “Advanced settings,” locate the following options:
- Check “Show hidden files, folders, and drives.”
- Uncheck “Hide protected operating system files (Recommended).”
- Click “OK” to apply the changes.
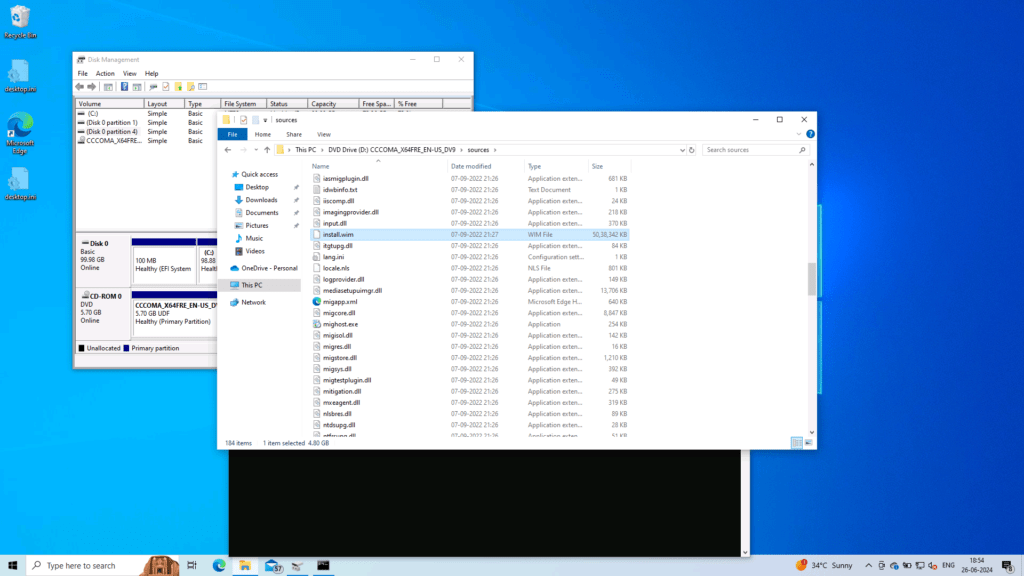
Navigate to C:\Windows\System32\Recovery\ and check if winre.wim file is present. If it does show up, it is fine. In case it is not there, you can gather it using 2 options given below:
- Use an existing Windows 10 Installation of the same architecture and copy it from the same C:\Windows\System32\Recovery\ path.
- Download a Windows 10 ISO file. From that, open the sources folder. Extract the install.wim file, which will have WinRE.wim file. More details here.
Put that in the respective folder for the next steps.
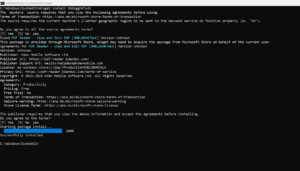
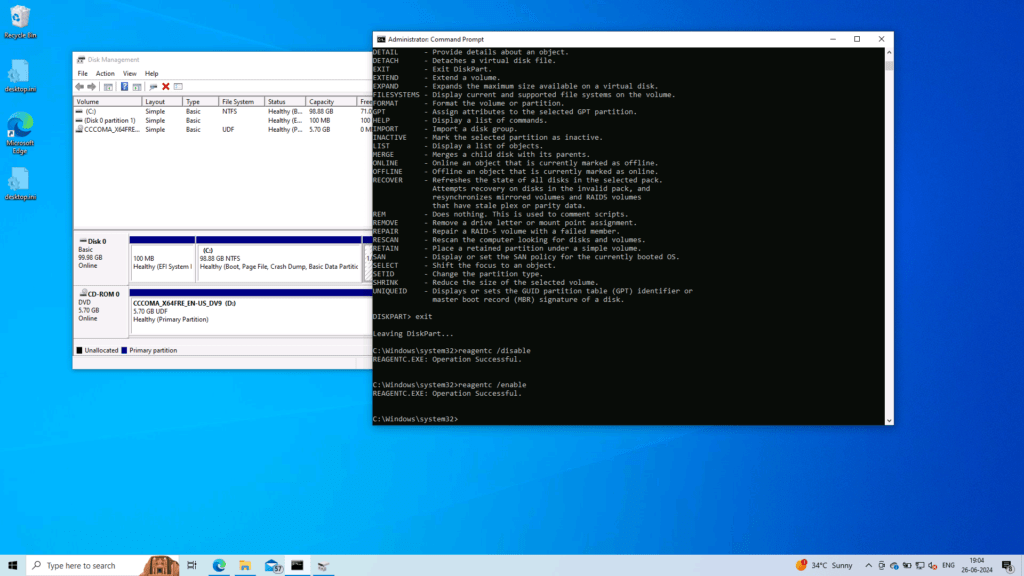
Disable the partition using the REAGENTC command
First, we need to disable WinRE using the command below so that after making the partition, it can be copied correctly. Do note that it might say that WinRE is already disabled, if it is already missing.
- reagentc /disable
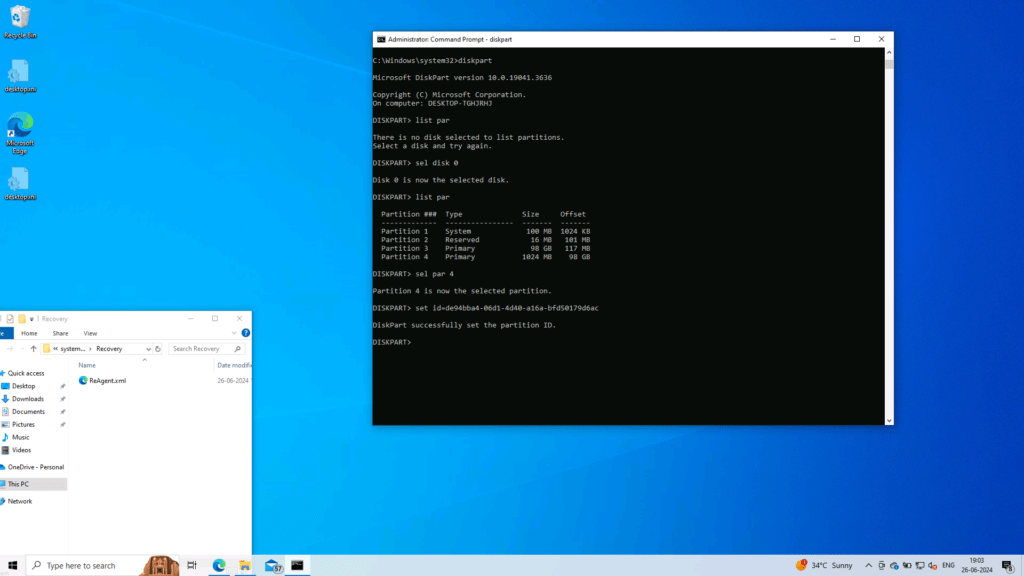
Then, in an elevated command Prompt, open the Diskpart command and use the commands to set Windows Recovery partition. Follow these in order:
- diskpart
- select disk X (Replace X with the disk number on which Windows is residing)
- list par (This command will list the partitions on the drive)
- select par X (Select the 1024 MB partition by replacing X with the number)
- set id=27 (This command informs the OS that it is a recovery partition)
OR
If your disk Partition layout is UEFI use this command instead:
- set id=de94bba4-06d1-4d40-a16a-bfd50179d6ac
Enable the WinRE
Next, enable WINRE using the command below and it is done:
- reagentc /enable
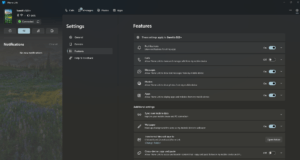
Now, you can check if your Recovery partion is installed, using Settings > Update and Security > Recovery > Advanced Startup in Windows 10. Further, for Windows 11, you can go to Settings > System > Recovery to open Windows Recovery environment.
To summarize, these steps help you add a Recovery partition in Windows if it is missing.